Mustard and Cress -Updated
I am very partial to egg mayonnaise and mustard and cress sandwiches something simple but oh so tasty. I have been getting very frustrated recently because each time I have had a fancy for these sandwiches and have gone round to my local shop they either haven't got the mustard and cress or they charge an arm and a leg for a small punnet. Desperate times have led to desperate measures. I am therefore going to attempt growing my own on the windowsill in the kitchen (pictures to follow), but I thought that you might like to join me in having a go. It might take you back to your inner child and it may help you with your little ones getting them growing things, eating them and learning about them all at the same time.
This can be grown on the windowsill all year long. The instructions I have which are old refer to buying a 25g/1 oz packet of seed which it says will give you several crops - much cheaper than buying cress itself.
1. Buy your seed.
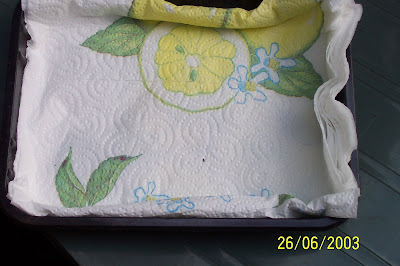
2. Make a growing medium from either a piece of old towelling, folded kitchen towel or paper or cotton wool. This is what you are to grow your seed on.


3. Fit into a recycled plastic tray and fit the growing medium to the tray and moisten thoroughly. I then add a little soil and make sure this is also moist


4. Grow cress seed first as it takes longer to germinate than the Mustard. Sprinkle the seed thickly on the growing medium and to germinate place the tray (I pope the tray into a polythene bag to keep the seeds warm) and place in a dark place to sprout the seed.
5. Two or three days later do the same with the Mustard in another container. Repeat as for the Cress.


6. Keep the seeds moist and put into the dark for 3 or 4 days (I covered with some tissue to keep the seed in the dark and then wrapped in a polythene bag outer.
7. Check the seeds daily to see that there are signs of growth.
8. As soon as the seed sprouts bring them into the full light but keep the pads moist at all times.
9. Cut the crop with very sharp scissors when the crop is 1 to 2 inches in height.
This is mine after only about four days

Enjoy in sandwiches, as an addition to salads
For young children as a novelty recyle used egg shells put a growing medium into the shell and then sprinkle on seeds thickly. Grow as above. When sprouted and reached desired height draw on a face and serve with a boiled runny egg to get them eating greens.
This can be grown on the windowsill all year long. The instructions I have which are old refer to buying a 25g/1 oz packet of seed which it says will give you several crops - much cheaper than buying cress itself.
1. Buy your seed.
2. Make a growing medium from either a piece of old towelling, folded kitchen towel or paper or cotton wool. This is what you are to grow your seed on.


3. Fit into a recycled plastic tray and fit the growing medium to the tray and moisten thoroughly. I then add a little soil and make sure this is also moist


4. Grow cress seed first as it takes longer to germinate than the Mustard. Sprinkle the seed thickly on the growing medium and to germinate place the tray (I pope the tray into a polythene bag to keep the seeds warm) and place in a dark place to sprout the seed.
5. Two or three days later do the same with the Mustard in another container. Repeat as for the Cress.


6. Keep the seeds moist and put into the dark for 3 or 4 days (I covered with some tissue to keep the seed in the dark and then wrapped in a polythene bag outer.
7. Check the seeds daily to see that there are signs of growth.
8. As soon as the seed sprouts bring them into the full light but keep the pads moist at all times.
9. Cut the crop with very sharp scissors when the crop is 1 to 2 inches in height.
This is mine after only about four days

Enjoy in sandwiches, as an addition to salads
For young children as a novelty recyle used egg shells put a growing medium into the shell and then sprinkle on seeds thickly. Grow as above. When sprouted and reached desired height draw on a face and serve with a boiled runny egg to get them eating greens.

Comments
Post a Comment
Hello, thank you for popping by